
Spring Boot自动装配原理
前言
我相信,只要你用过Spring Boot,就会对这样一个现象非常的好奇:
引入一个组件依赖,加个配置,这个组件就生效了。
举个例子来说,比如我们常用的Redis, 在Spring Boot中的使用方式是这样的:
1.引入依赖
<dependency>
  <groupId>org.springframework.boot</groupId>
  <artifactId>spring-boot-starter-data-redis</artifactId>
</dependency>
2.编写配置
spring:
  redis:
    database: 0
    timeout: 5000ms
    host: 127.0.0.1
    port: 6379
    password: 123456
好了,接下来只需要使用时注入RedisTemplate就能使用了,像这样:
@Autowired
private RedisTemplate redisTemplate;
这期间,我们做了什么嘛?我们什么也没有做,那么,这个RedisTemplate对象是怎么注入到Spring容器中的呢?
接下来,就让我们带着这样的疑问逐步剖析其中的原理,这个原理就叫做自动装配。
SPI
先不着急,在这之前,我们先来了解了解上古大法:SPI机制。
SPI ,全称为 Service Provider Interface(服务提供者接口),是一种服务发现机制。它通过在classpath路径下的META-INF/services文件夹查找文件,自动加载文件中所定义的类。
栗子
建一个工程,结构如下
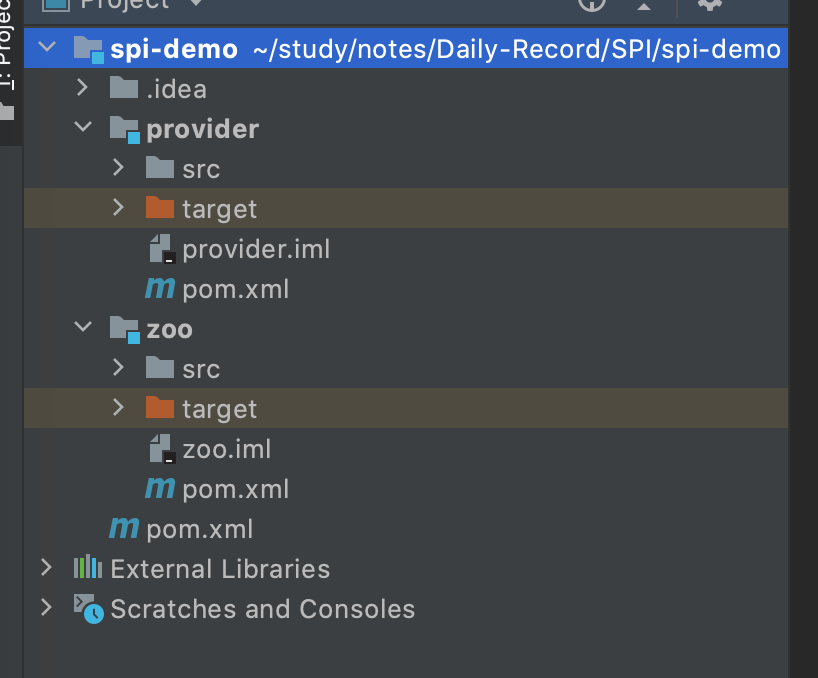
provider 为服务提供方,可以理解为我们的框架
zoo 为使用方,因为我的服务提供接口叫Animal,所以所有实现都是动物~
pom.xml里面啥都没有
1. 定义一个接口
在provider模块中定义接口Animal
package cn.zijiancode.spi.provider;

/**
 * 服务提供者 动物
 */
public interface Animal {

    // 叫
    void call();
}
2. 使用该接口
在zoo模块中引入provider
<dependency>
  <groupId>cn.zijiancode</groupId>
  <artifactId>provider</artifactId>
  <version>1.0.0</version>
</dependency>
写一个小猫咪实现Animal接口
public class Cat implements Animal {
    @Override
    public void call() {
        System.out.println("喵喵喵~~");
    }
}
写一个狗子也实现Animal接口
public class Dog implements Animal {

    @Override
    public void call() {
        System.out.println("汪汪汪!!!");
    }
}
3. 编写配置文件
新建文件夹META-INF/services
在文件夹下新建文件cn.zijiancode.spi.provider.Animal
对,你没看错,接口的全限定类名就是文件名
编辑文件
cn.zijiancode.spi.zoo.Dog
cn.zijiancode.spi.zoo.Cat
里面放实现类的全限定类名
3. 测试
package cn.zijiancode.spi.zoo.test;

import cn.zijiancode.spi.provider.Animal;

import java.util.ServiceLoader;

public class SpiTest {

    public static void main(String[] args) {
        // 使用Java的ServiceLoader进行加载
        ServiceLoader<Animal> load = ServiceLoader.load(Animal.class);
        load.forEach(Animal::call);
    }
}
测试结果:
汪汪汪!!!
喵喵喵~~
整个项目结构如下:

借助SPI理解自动装配
回顾一下我们做了什么,我们在resources下创建了一个文件,里面放了些实现类,然后通过ServiceLoader这个类加载器就把它们加载出来了。
假设有人已经把编写配置之类的前置步骤完成了,那么我们是不是只需要使用下面的这部分代码,就能将Animal有关的所有实现类调度出来。
// 使用Java的ServiceLoader进行加载
ServiceLoader<Animal> load = ServiceLoader.load(Animal.class);
load.forEach(Animal::call);
再进一步讲,如果再有人把上面这部分代码也给写了,然后把这些实现类全部注入到Spring容器里,那会发生什么?
哇塞,那我他喵的不是就能直接注入然后汪汪汪了吗?!
相信到这里大家心里都已经有个谱了
找找Spring Boot中的配置文件
在SPI机制中,是通过在组件下放入一个配置文件完成的,那么Spring Boot是不是也这样的呢?我们就来找一找吧。
打开redis的组件

咦,这里面却并没有看到有关自动装配的文件,难道我们的猜想是错的嘛?
别急,其实所有spring-boot-starter-x的组件配置都是放在spring-boot-autoconfigura的组件中的
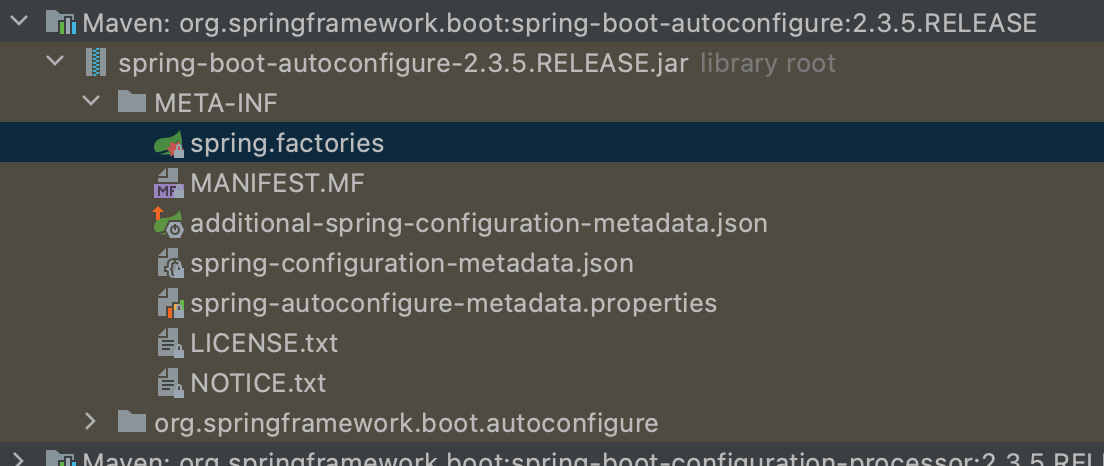
这里有个spring.factories的文件,翻译一下就是spring的工厂,咦,有点像了,打开看看
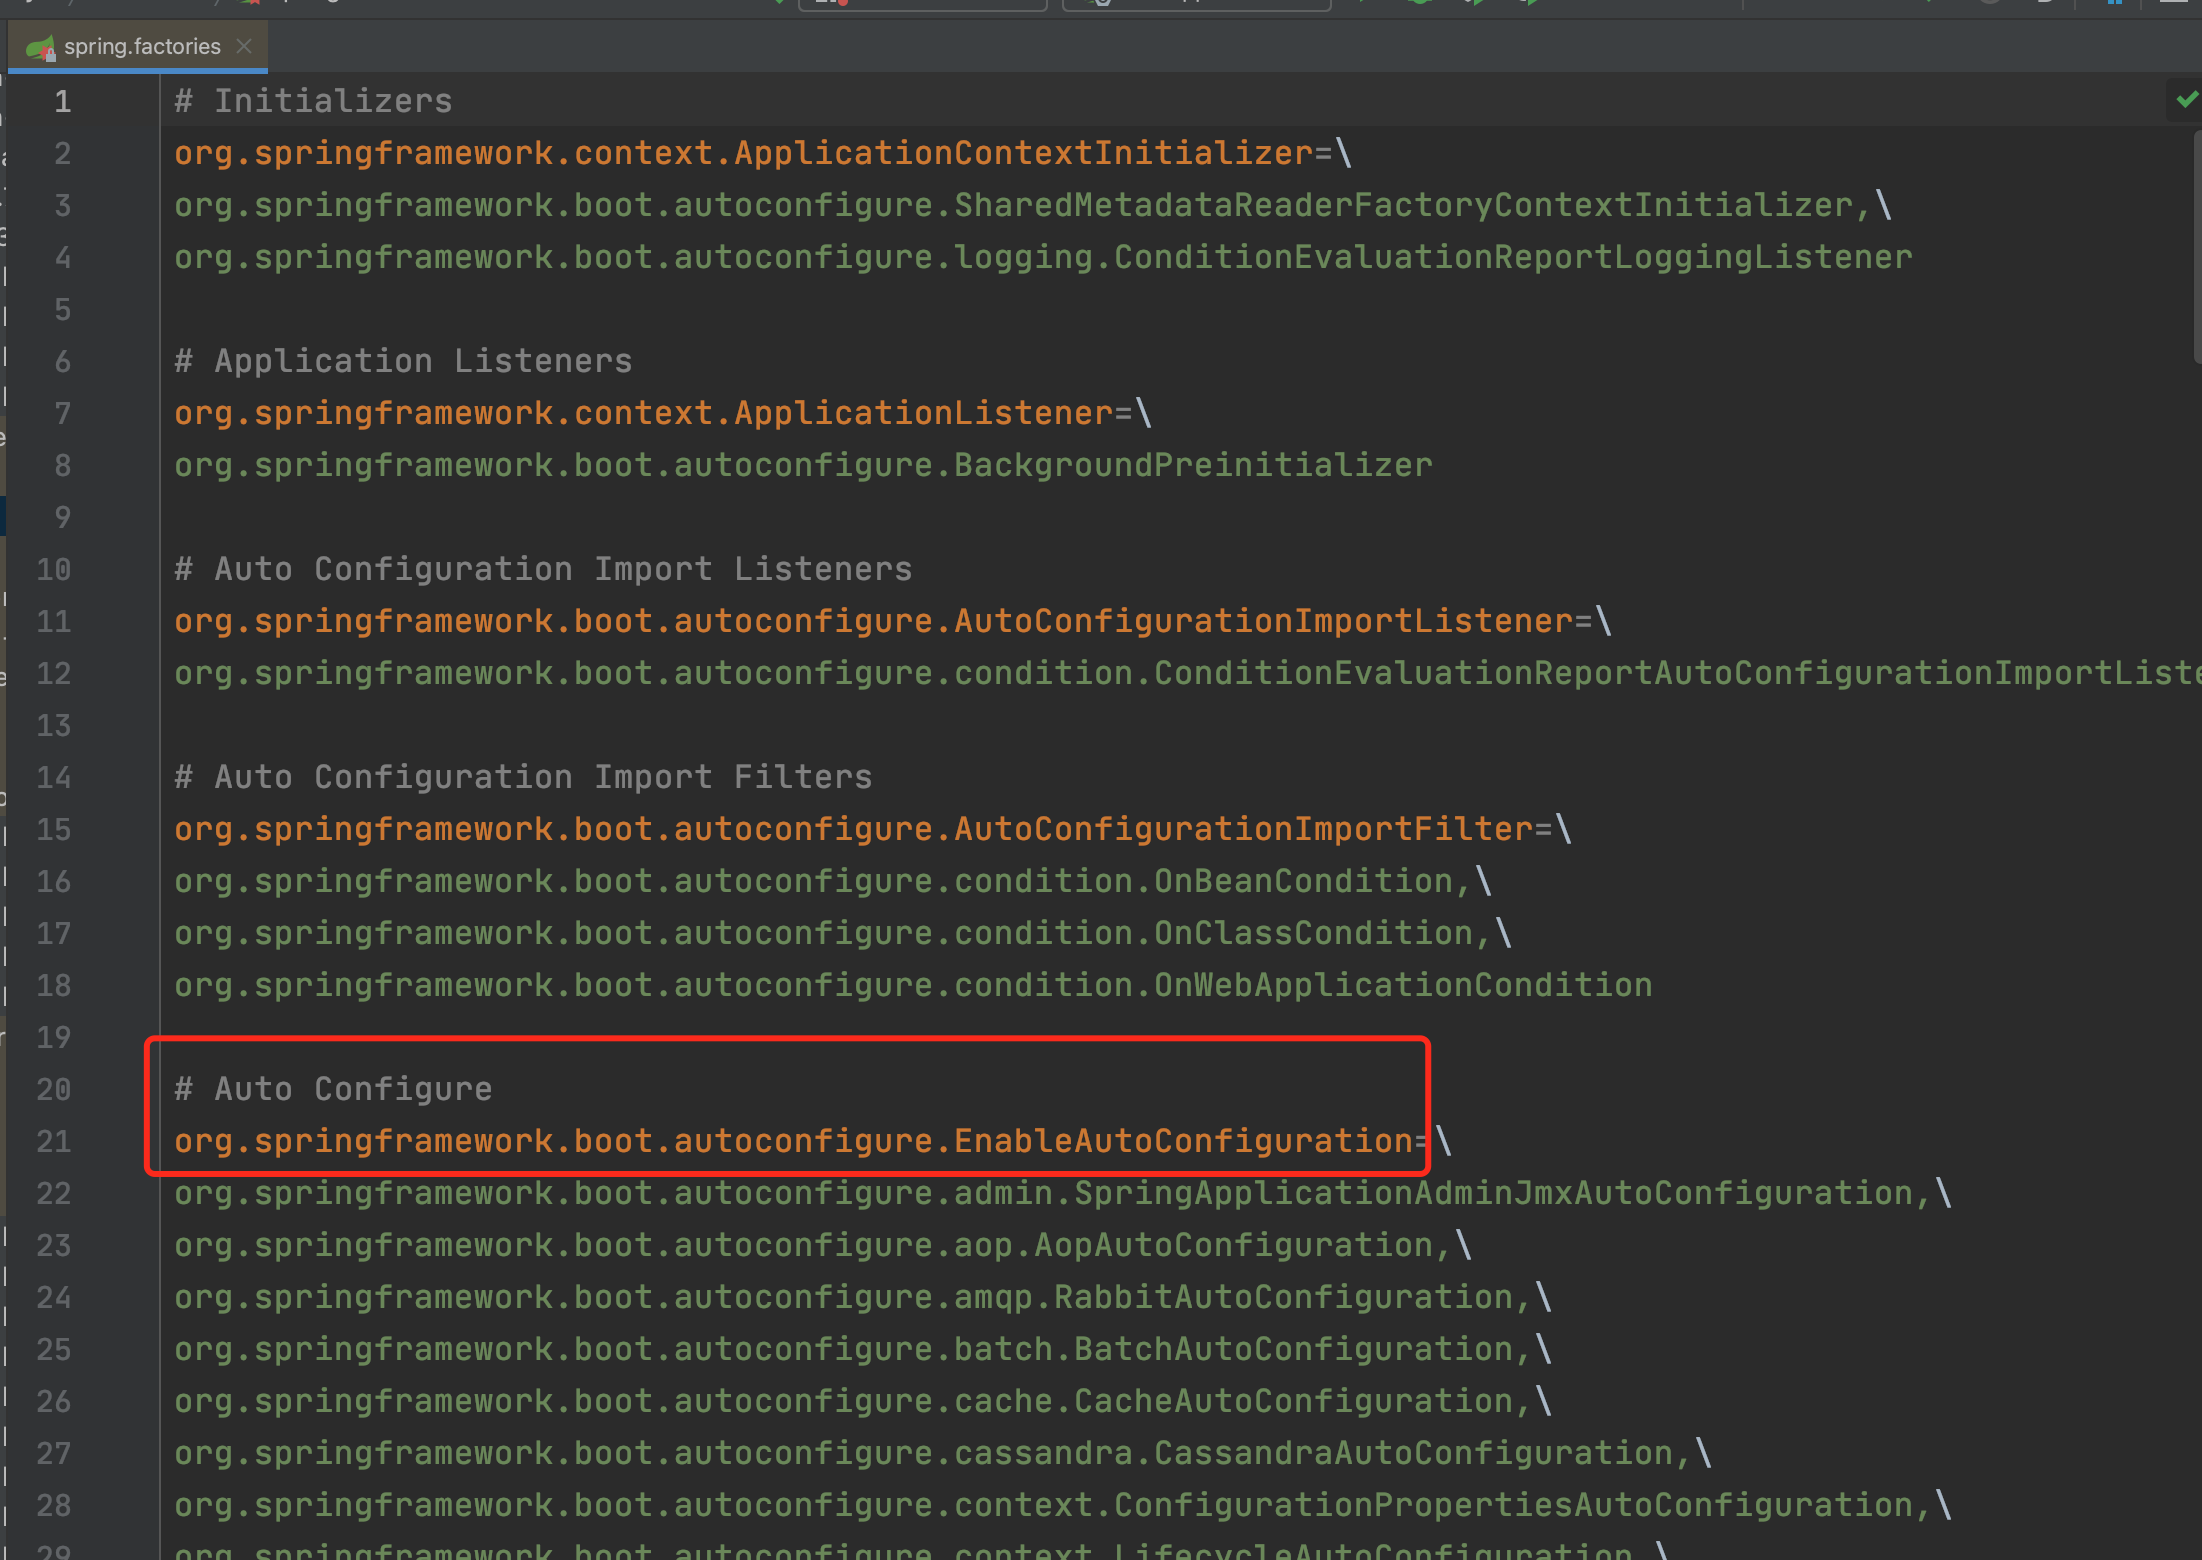
其他的我们先不用管,可以很明显的看到最下面有个自动配置的注释,key还是个
EnableAutoConfiguration,开启自动配置!噢噢噢噢噢!找到了找到了!
往下翻一下,看看有没有Redis相关的。
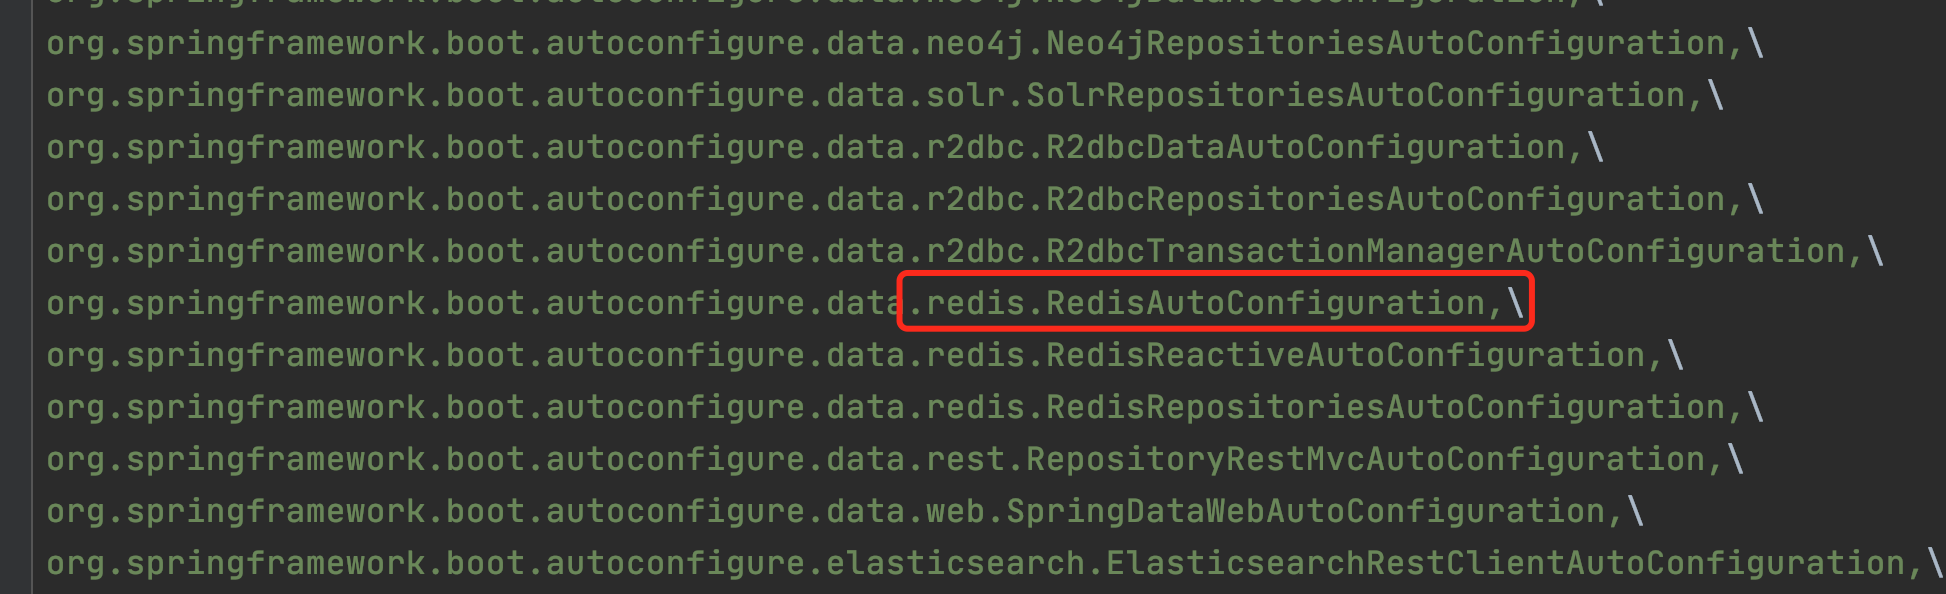
再打开这个RedisAutoConfiguration类,看看里面是些什么代码
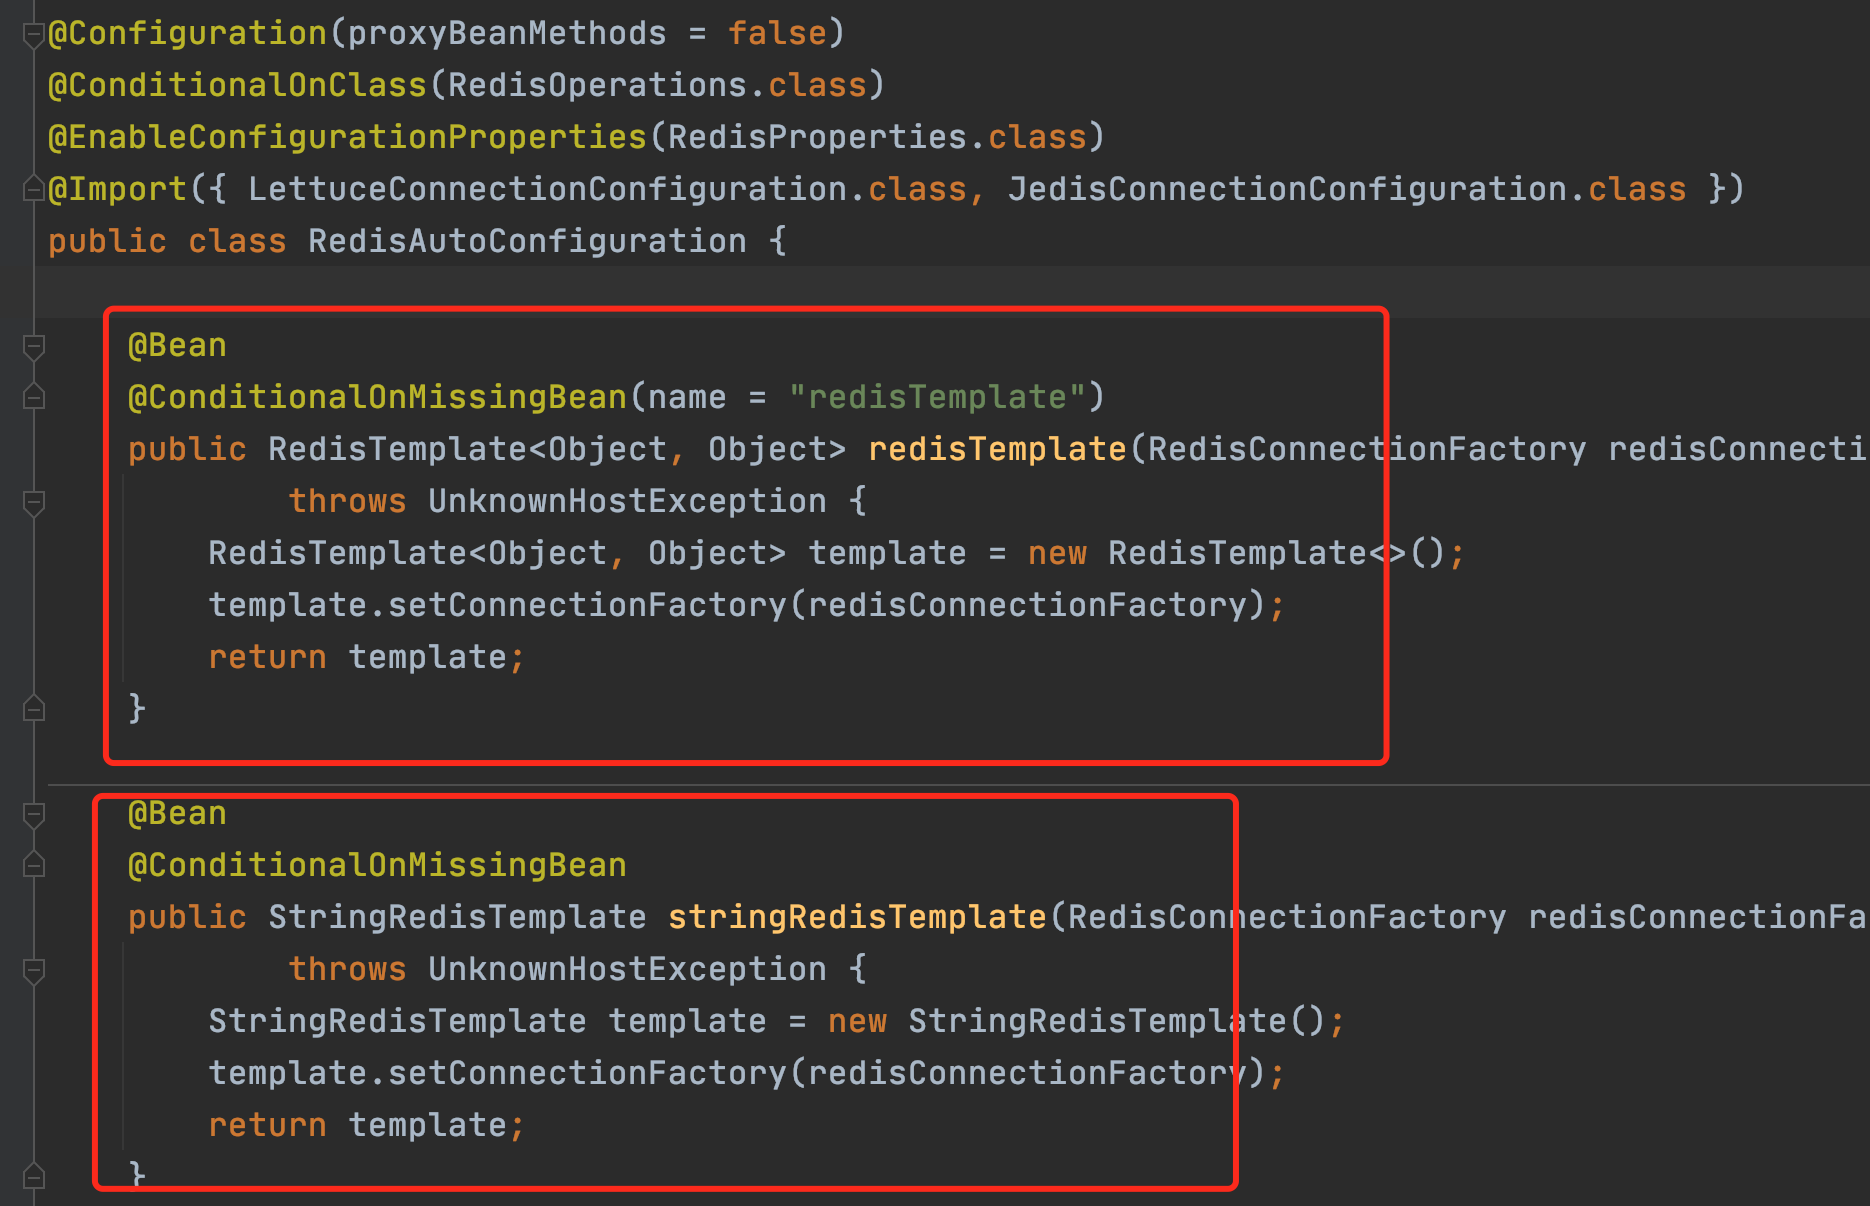
OMG! 破案了破案了!
现在,配置文件我们也找到了:spring.factories,也实锤了就是通过这个配置文件进行的自动配置。
那么,我们来尝试还原一下案情经过:通过某种方式读取spring.factories文件,紧接着把里面所有的自动配置类加载到Spring容器中,然后就可以通过Spring的机制将配置类的@Bean注入到容器中了。
接下来,我们就来学习一下这个某种方式究竟是什么吧~
Spring中的一些注入方式
阿鉴先透露一下,这个某种方式,其实就是某一种注入方式,我们先来看看Spring中有哪些注入方式
聊起Spring,我可是老手了,有兴趣的小伙伴可以看看我的Spring源码分析系列:https://zijiancode.cn/categories/source-framework
关于注入方式,相信小伙伴肯定也是:就这?
类似于@Component,@Bean这些,阿鉴就不说了,大家肯定见过一种这样的注解:EnableXxxxx
比如:EnableAsync开启异步,EnableTransactionManagement开启事务
大家好不好奇这样的注解是怎么生效的?
点开看看呗

嘿,其实里面是个Import注解
Import注解的3种使用方式
我知道,肯定有小伙伴懂得Import注解如何使用,但是为了照顾不懂的小伙伴,阿鉴还是要讲一讲,懂的小伙伴就当复习啦
1.普通的组件
public class Man {

    public Man(){
        System.out.println("Man was init!");
    }
}
@Import({Man.class})
@Configuration
public class MainConfig {
}
在配置类上使用@Import注解,值放入需要注入的Bean就可以啦
2.实现ImportSelector接口
public class Child {

    public Child(){
        System.out.println("Child was init!");
    }
}
public class MyImport implements ImportSelector {
    @Override
    public String[] selectImports(AnnotationMetadata importingClassMetadata) {
        return new String[]{"com.my.source.spring.start.forimport.Child"};
    }
}
@Import({MyImport.class})
@Configuration
public class MainConfig {
}
这种方式往Spring中注入的是一个ImportSelector,当Spring扫描到
MyImport,将会调用selectImports方法,将selectImports中返回的String数组中的类注入到容器中。
3.实现ImportBeanDefinitionRegistrar接口
public class Baby {

    public Baby(){
        System.out.println("Baby was init!");
    }
}
public class MyImportBeanDefinitionRegistrar implements ImportBeanDefinitionRegistrar {
    @Override
    public void registerBeanDefinitions(AnnotationMetadata importingClassMetadata, BeanDefinitionRegistry registry) {
        BeanDefinition beanDefinition = new RootBeanDefinition(Baby.class);
        registry.registerBeanDefinition("my-baby",beanDefinition);
    }
}
@Import({MyImportBeanDefinitionRegistrar.class})
@Configuration
public class MainConfig {
}
类似于第二种,当Spring扫描到该类时,将会调用
registerBeanDefinitions方法,在该方法中,我们手动往Spring中注入了一个Baby的Bean,理论上可以通过这种方式不限量的注入任何的Bean
SpringBootApplication注解
我们在使用SpringBoot项目时,用到的唯一的注解就是@SpringBootApplication,所以我们唯一能下手的也只有它了,打开它看看吧。
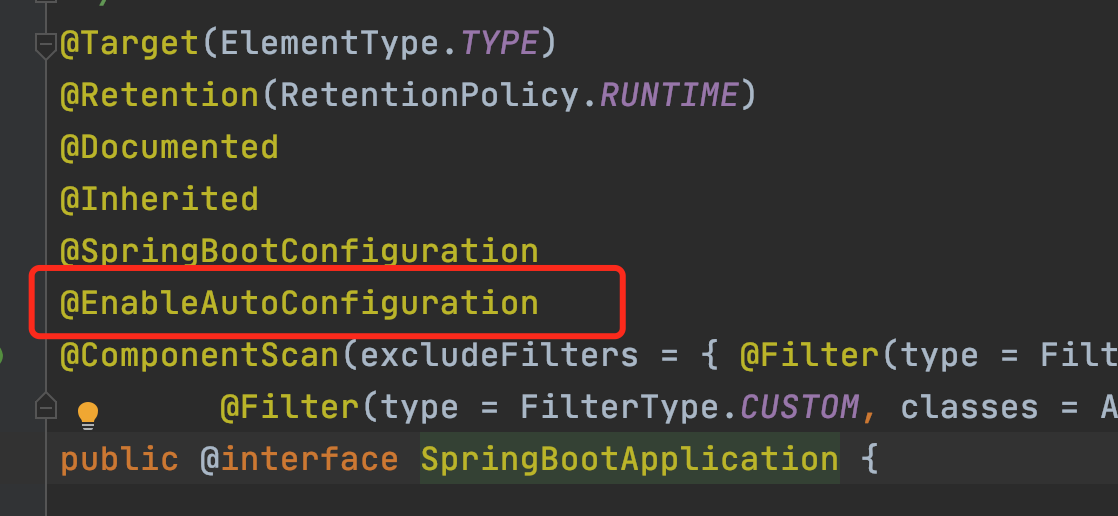
嘿!看看我们发现了什么?EnableAutoConfiguration!妥妥的大线索呀

EnableAutoConfiguration本质上也是通过Import完成的,并且Import了一个Selector
让我们瞧一瞧里面的代码逻辑吧~
selectImports
@Override
public String[] selectImports(AnnotationMetadata annotationMetadata) {
  if (!isEnabled(annotationMetadata)) {
    return NO_IMPORTS;
  }
  AutoConfigurationEntry autoConfigurationEntry = getAutoConfigurationEntry(annotationMetadata);
  return StringUtils.toStringArray(autoConfigurationEntry.getConfigurations());
}
getAutoConfigurationEntry
protected AutoConfigurationEntry getAutoConfigurationEntry(AnnotationMetadata annotationMetadata) {
  if (!isEnabled(annotationMetadata)) {
    return EMPTY_ENTRY;
  }
  AnnotationAttributes attributes = getAttributes(annotationMetadata);
  // 获取候选的配置类
  List<String> configurations = getCandidateConfigurations(annotationMetadata, attributes);
  // 移除重复的配置
  configurations = removeDuplicates(configurations);
  // 获取到要排除的配置
  Set<String> exclusions = getExclusions(annotationMetadata, attributes);
  checkExcludedClasses(configurations, exclusions);
  // 移除所有要排除的配置
  configurations.removeAll(exclusions);
  // 过滤掉不具备注入条件的配置类,通过Conditional注解
  configurations = getConfigurationClassFilter().filter(configurations);
  // 通知自动配置相关的监听器
  fireAutoConfigurationImportEvents(configurations, exclusions);
  // 返回所有自动配置类
  return new AutoConfigurationEntry(configurations, exclusions);
}
我们主要看看是如何从配置文件读取的
getCandidateConfigurations
protected List<String> getCandidateConfigurations(AnnotationMetadata metadata, AnnotationAttributes attributes) {
  // 这里就是关键,使用SpringFactoriesLoader加载所有配置类,是不是像我们SPI的ServicesLoader
  List<String> configurations = SpringFactoriesLoader.loadFactoryNames(getSpringFactoriesLoaderFactoryClass(),
                                                                       getBeanClassLoader());
  Assert.notEmpty(configurations, "No auto configuration classes found in META-INF/spring.factories. If you "
                  + "are using a custom packaging, make sure that file is correct.");
  return configurations;
}
getSpringFactoriesLoaderFactoryClass
protected Class<?> getSpringFactoriesLoaderFactoryClass() {
  return EnableAutoConfiguration.class;
}
结合上一步,就是加载配置文件,并且读取key为EnableAutoConfiguration的配置
loadFactoryNames
public static List<String> loadFactoryNames(Class<?> factoryType, @Nullable ClassLoader classLoader) {
  String factoryTypeName = factoryType.getName();
  return loadSpringFactories(classLoader).getOrDefault(factoryTypeName, Collections.emptyList());
}
private static Map<String, List<String>> loadSpringFactories(@Nullable ClassLoader classLoader) {

  try {
    // FACTORIES_RESOURCE_LOCATION的值为:META-INF/spring.factories
    // 这步就是意味中读取classpath下的META-INF/spring.factories文件
    Enumeration<URL> urls = (classLoader != null ?
                             classLoader.getResources(FACTORIES_RESOURCE_LOCATION) :
                             ClassLoader.getSystemResources(FACTORIES_RESOURCE_LOCATION));
    // 接下来就是读取出文件内容,封装成map的操作了
    result = new LinkedMultiValueMap<>();
    while (urls.hasMoreElements()) {
      URL url = urls.nextElement();
      UrlResource resource = new UrlResource(url);
      Properties properties = PropertiesLoaderUtils.loadProperties(resource);
      for (Map.Entry<?, ?> entry : properties.entrySet()) {
        String factoryTypeName = ((String) entry.getKey()).trim();
        for (String factoryImplementationName : StringUtils.commaDelimitedListToStringArray((String) entry.getValue())) {
          result.add(factoryTypeName, factoryImplementationName.trim());
        }
      }
    }
    cache.put(classLoader, result);
    return result;
  }
  catch (IOException ex) {
    throw new IllegalArgumentException("Unable to load factories from location [" +
                                       FACTORIES_RESOURCE_LOCATION + "]", ex);
  }
}
over, 后面的过滤逻辑阿鉴就不在这里说了,毕竟本节的重点是自动装配机制,小伙伴明白了原理就ok啦
ps: 因为后面的逻辑其实挺复杂的,展开了说就太多啦
小结
本篇介绍了关于SpringBoot的自动装配原理,我们先通过SPI机制进行了小小的热身,然后再根据SPI的机制进行推导Spring的自动装配原理,中间还带大家回顾了一下@Import注解的使用,最后成功破案~
下节预告:实现自定义starter